A Practitioner’s Step-by-Step Fix — Home & SMB Series — Updated July 2026
Your Jio Fiber plan says 100 Mbps. Your Teams call is freezing mid-sentence. Your manager thinks your internet is broken. It isn’t — but without Quality of Service (QoS), your router has no idea that a video call matters more than a background software update.
This guide shows you, step by step, how to configure QoS on the router your ISP supplied — whether you are on Jio Fiber, Airtel FTTH, ACT Fibernet, or BSNL. No jargon. No guesswork. Each step explains what to do and why it matters.
Before You Do Anything — Is This the Right Fix for You?
QoS solves a specific problem: too many devices competing for the same internet connection at the same time. It will not help if your issue is something else. Work through these three questions before touching your router settings.
Run a speed test at fast.com right now — on the device that is giving you trouble, not your phone. If your actual download speed is significantly below what your ISP plan promises, QoS will not help. A connection that is already throttled or degraded at the ISP level needs a different fix. Call your ISP and ask for a line quality check first.
Is the problem happening only on Wi-Fi, or also on a wired connection? Plug your laptop directly into the router using an Ethernet cable (a Cat 5e or Cat 6 cable, available for under ₹200 at any electronics shop). If the problem disappears on a wired connection, your Wi-Fi signal quality is the issue — not bandwidth sharing — and QoS will give you limited benefit. Scroll to the last section of this guide for what to try next.
How many devices are on your network at the same time? If it is just your laptop and a phone, QoS may not be necessary. QoS matters most when three or more devices are actively using the connection — a laptop on a Teams call, a TV streaming Netflix, a phone downloading an app update, all at once.
| NetDaemons take: If all three answers point to a real bandwidth-sharing problem and your speed test shows you are getting your full plan speed, continue. QoS is the right tool for your situation. |
What Is Actually Causing This
Think of your internet connection as a single lane road. When you subscribed to a 100 Mbps plan, that lane can carry 100 Mbps of traffic at any given moment. The moment three vehicles try to use that lane simultaneously — your Teams call, your child’s YouTube video, and an automatic Windows update — they collide and slow each other down.
A Teams or Zoom video call requires a steady, low-delay flow of data — roughly 1.5 to 4 Mbps continuously. A software update or file download does not care about delay. It can wait a fraction of a second and then send the next chunk. Without QoS, your router treats both equally. The update grabs whatever bandwidth it can, and your call suffers.
QoS tells the router to give priority to delay-sensitive traffic — video calls, voice calls, gaming — and let everything else use whatever is left over. The total bandwidth does not increase. The distribution of it becomes smarter.
| From the field One thing worth knowing before you configure QoS: there is a trap called traffic starvation. If you set your laptop to the highest priority and never cap how much bandwidth it can claim, it will consume as much as it wants — and the router will let it, at the expense of everything else. This is the same problem QoS is supposed to solve, just applied in the wrong direction. The right approach is to set your work laptop to high priority but leave rate-limiting alone — the router will protect the call without cutting off other devices entirely. Do not set more than one or two devices to high priority simultaneously. |
How to Set Up QoS — Step by Step
Step 1: Know Your Router’s Admin Address
Every home router has a web-based settings panel you can access from any browser on your home network. The address depends on your ISP.
| ISP | Admin URL | Default Credentials | QoS Location |
| Jio Fiber | 192.168.29.1 | admin / jiocentrum (check label) | Advanced > QoS or Bandwidth Control |
| Airtel FTTH | 192.168.1.1 | admin / airtel123 (check label) | Advanced > QoS or Traffic Management |
| BSNL FTTH | 192.168.1.1 | admin / admin (varies by model) | Advanced > QoS (if present — varies by router model) |
| ACT Fibernet | 192.168.1.1 | admin / admin (check sticker — varies by D-Link or TP-Link model supplied) | Advanced > QoS or Traffic Control (label varies by model) |
The table above shows the most commonly reported defaults, but your specific router may differ. Always check the sticker on the underside or back panel of your router first — the admin URL, username, and password are printed there. If the sticker credentials do not work, try the table values above. If neither works and you cannot recall whether you changed the password, call your ISP’s helpline and ask them to confirm the router admin URL for your model. Do not attempt a factory reset without reading the caution note below.
Open a browser (Chrome, Firefox, or Edge — not the app) on your laptop or desktop. Type the address for your ISP in the address bar and press Enter. You should see a login page. If you get an error, try 192.168.0.1 as an alternative — some Airtel and BSNL models use this address.
Log in with your credentials. If the default password does not work, check the sticker on the bottom or back of your router. If someone has changed the password and you do not know it, you may need to reset the router to factory defaults — but read this caution before you do. A factory reset wipes every setting on the router: your Wi-Fi name, your Wi-Fi password, and — critically — the WAN or PPPoE credentials your ISP technician configured when the connection was installed. On most Jio and Airtel FTTH connections, these credentials are embedded by the ISP during provisioning and are not stored anywhere accessible to you. If you reset without having those details, your internet connection will stop working until an ISP technician reconfigures it. Before performing a factory reset, call your ISP helpline and ask them to provide your PPPoE username and password, or to send a technician. Once you have those credentials in hand, you can safely reset the router and reconfigure it. To factory reset: press and hold the reset button for 10 seconds using a pin.
Step 2: Find the QoS Setting
Router admin interfaces are not consistent, even within the same ISP. The QoS setting is usually inside an ‘Advanced’ section. Here is what to look for on each ISP router.
On a Jio Fiber router: after logging in at 192.168.29.1, look for ‘Advanced Settings’ in the top menu. Inside, look for ‘QoS’ or ‘Bandwidth Management’ or ‘Traffic Control’. Jio has supplied several different router models over the years — the exact label varies, but it is almost always under the Advanced menu.
On an Airtel FTTH router: after logging in at 192.168.1.1, look for ‘Advanced’ or ‘Management’ in the navigation menu. The QoS section may be labelled ‘Traffic Management’, ‘Bandwidth Control’, or ‘QoS’. Some Airtel-supplied Huawei HG8145 or similar models may have limited QoS options — if you cannot find it, check the ‘WAN’ or ‘LAN’ sub-sections.
On a BSNL FTTH router: QoS availability varies significantly by the model BSNL has supplied in your area. Some models have a full QoS section; others do not. If you cannot find any QoS option, this may not be configurable on your specific router — jump to the last section of this guide.
| NetDaemons take: If your Jio or Airtel router does not show a QoS option, do not worry — we cover your options at the end of this guide. ISP-supplied routers are often locked-down versions of commercial hardware, and not all features are exposed. |
Step 3: Enable QoS and Set Your Actual Speed
Once you find the QoS section, you will see a toggle or checkbox to enable it, followed by fields to enter your upload and download speeds.
This step matters more than most guides explain: if you enter a speed higher than what your ISP actually delivers, QoS will not work correctly. The router uses these numbers to calculate how to divide the available bandwidth. Enter slightly less than your actual speed — if your speed test shows 92 Mbps download and 45 Mbps upload, enter 88 Mbps and 42 Mbps respectively. The small headroom prevents the router from fighting the ISP’s own traffic shaping.
Enable QoS, enter the corrected speeds, and save or apply the settings. Your router may restart — this is normal. The restart takes 60 to 90 seconds on most home routers.
Step 4: Set Device or Application Priority
This is where QoS becomes genuinely useful. You are telling the router which device or application gets priority when the connection is congested.
Most ISP-supplied routers offer either device-based priority (by the device name or MAC address) or application-based priority (by service type — video call, gaming, streaming). Look for a section labelled ‘Priority Rules’, ‘Device Priority’, or ‘Application Priority’.
For device-based priority: look for your laptop or desktop in the connected devices list. Most routers show device names. Set your work laptop to ‘High’ or ‘Highest’ priority. Set smart TVs, phones used for entertainment, and tablets to ‘Normal’ or ‘Low’ priority.
For application-based priority: look for a ‘Video Conferencing’ or ‘VoIP’ category and set it to high priority. Some routers let you add specific ports to prioritise. Based on official Microsoft and Zoom documentation: Microsoft Teams uses UDP ports 3478 (STUN/relay), 3479 (audio), 3480 (video), and 3481 (screen sharing) for all real-time media, with TCP ports 80 and 443 for signalling. Zoom Meetings uses UDP ports 3478, 3479, and 8801 through 8810 for media transport, with TCP ports 443, 8801, and 8802 as fallback. If your router allows port-range entries, prioritising UDP 3478–3481 covers Teams media completely; adding UDP 8801–8810 covers Zoom media. TCP 443 should already be unrestricted on any home network. These port assignments are documented in the Microsoft Teams call flows guide (learn.microsoft.com) and the Zoom network firewall settings article (support.zoom.com) respectively.
Save all settings. If your router asks you to confirm or reboot again, allow it.
How to Verify It Worked
Do not just run a speed test and assume it is working. QoS is a congestion management tool — you need to test it under load.
- Start a Teams or Zoom call (or ask a family member to help you simulate one). Keep it running.
- On a second device — a phone or tablet — start streaming a YouTube video in HD (1080p). On a third device, start a large file download if possible.
- Observe the Teams or Zoom call quality. Before QoS, this scenario would produce pixelation, freezing, or audio dropouts. After correctly configured QoS, the call should remain stable while the video stream and download continue in the background (possibly at reduced quality — that is expected and correct behaviour).
- You can also use a free tool called ‘Wi-Fi Analyser’ (Android) or ‘Network Analyser’ (iOS) to look at signal strength and channel congestion on your home network — useful context even if it does not directly measure QoS performance.
What you should see: the call remains clear, even if the download slows down. The download being slower is the expected outcome — QoS is correctly throttling lower-priority traffic in favour of your call.
If This Did Not Fix It
QoS is configured, but the call quality problem persists. Here are the three most common reasons.
Your ISP-supplied router does not actually implement QoS reliably
This is more common than the routers’ own interfaces suggest. Several Jio and Airtel entry-level GPON routers expose a QoS menu but do not enforce the rules consistently in firmware. The setting appears to save, but the prioritisation does not function under real load. If you have followed every step above and see no improvement, this is likely the cause.
The problem is on the GPON or ISP network side, not your home network
Jio Fiber and Airtel FTTH both use GPON (Gigabit Passive Optical Network — the fibre infrastructure that delivers your broadband connection) technology. In a GPON setup, your ONT (Optical Network Terminal — the white or grey box on your wall where the fibre cable enters your home) is shared with up to 64 other premises in your building or area. During peak hours — 7 pm to 11 pm in Indian metros — contention on the shared GPON segment can cause packet loss and jitter that QoS on your home router cannot fix, because the problem is upstream of your router. The only resolution is calling your ISP and asking for a line quality report or a GPON port migration.
Your 2.4 GHz Wi-Fi band is saturated
In a metro apartment building with 50 to 80 overlapping Wi-Fi networks, the 2.4 GHz band is effectively unusable for video calls. If your work laptop is connecting to your router on 2.4 GHz, you will see choppy call quality regardless of QoS settings. Go into your laptop’s Wi-Fi settings and check which band it is connected to. If it shows 2.4 GHz, try moving to 5 GHz by selecting the 5 GHz network name (usually labelled with a ‘-5G’ suffix). Indian construction uses thick reinforced concrete — if 5 GHz signal is weak in your work location, this is a placement problem, not a QoS problem. For practical fixes to poor 5 GHz coverage across floors and concrete walls, see our guide to the Best Mesh Wi-Fi Systems in India Under ₹15,000 and our article on How to Fix Slow Wi-Fi in Indian Apartments which will be releasing soon.
| From the field Latency and jitter problems — the technical causes of call drops, choppy audio, and video buffering — are persistent issues in enterprise and service provider networks too, and misconfigured or absent QoS is behind most of them. At home scale, the same logic applies: when your router treats a 4K stream and a Teams call identically, they compete for the same queue, and the call loses. If the problem persists after configuring QoS, the next step is to isolate whether the fault is inside your home network or upstream at the ISP. Connect a laptop directly to your ONT (the fibre terminal on your wall) using an Ethernet cable and run a speed and jitter test at speed.cloudflare.com. Poor results on this wired direct connection mean the problem is the ISP’s infrastructure — no home equipment will fix it. When you call, ask specifically for a line quality report or a GPON port test rather than making a generic complaint. That language signals you understand the architecture and typically gets the call escalated faster. |
Team NetDaemons Verdict
The following reflects the independent assessment of the NetDaemons team.
QoS on an ISP-supplied router is worth configuring — it costs nothing and takes under 20 minutes. But it is a partial solution. If your ISP-supplied router’s QoS is unreliable, if your work location is too far from the router for a strong 5 GHz signal, or if multiple family members are all on video calls simultaneously, the router itself is the limiting factor.
In that case, the most impactful upgrade is a third-party router that implements QoS properly. ISP-supplied routers are functional but often stripped-down — a dedicated consumer router gives you a more reliable QoS engine, a cleaner management interface, and the confidence that the priority rules you set are actually being enforced. If your apartment spans two or more floors, a mesh system is a more effective fix than any QoS configuration.
| TP-Link Archer C6 (AC1200, Wi-Fi 5) 👉 Check current price on Amazon India NetDaemons take: A dual-band Wi-Fi 5 router with device-level QoS accessible under Advanced > QoS in the TP-Link web interface. At around ₹2,800 on Amazon India (verify current price before purchase), it is the most affordable way to get reliable device-priority QoS. Works with Jio Fiber and Airtel FTTH in access-point or double-NAT mode. The right choice if your ISP plan is 100 Mbps or below and your work area is in the same room or directly adjacent to the router. |
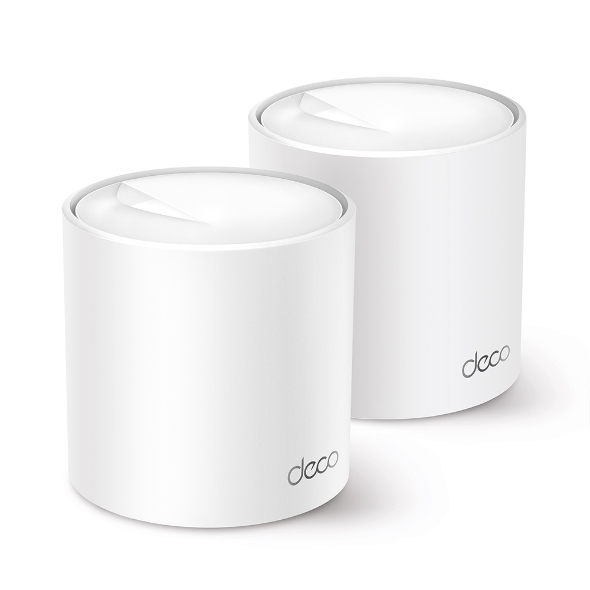
| TP-Link Deco M4 Mesh System (2-pack) 👉 Check current price on Amazon India If you are working in a room far from your main router, or across a floor with thick concrete walls, a mesh system is a more effective fix than tweaking QoS. The Deco M4 is our most recommended entry-level mesh system for Indian apartments. We reviewed it in detail in our article on the Best Mesh Wi-Fi Systems in India Under ₹15,000 |
If you are not sure whether a new router or a mesh system is the right next step, our guide to the Best Wi-Fi Routers in India Under ₹5,000 walks through the options with the same engineering-first approach we have used here. Start with the QoS configuration in this guide first — if call quality improves, you are done. If it does not, run the ONT direct-connection test described above and call your ISP with the results before spending anything on new hardware.
| Disclaimer The information in this guide reflects our research and experience at the time of writing. Router admin interfaces, firmware versions, and ISP default settings change — verify all steps against your specific router model and ISP documentation before making any changes to your home network. Pricing for recommended products is indicative, sourced from Amazon India at time of publication, and subject to change. Actual prices vary by seller, SKU, configuration, and volume. Verify current pricing directly on Amazon India before making any purchase decision. Product availability is indicative and subject to stock levels, supply chain conditions, and regional logistics. Confirm availability on Amazon India at the time of purchase. Product verdicts and recommendations in this article represent the independent assessment of the NetDaemons team. We have no commercial relationship with any router manufacturer mentioned. We may earn a commission on purchases made through affiliate links at no additional cost to you. Readers should evaluate all recommendations against their own requirements before deciding. |
Related Articles
Best Wi-Fi Routers in India Under ₹5,000 — Engineer’s Honest Assessment 2026
Best Mesh Wi-Fi Systems in India Under ₹15,000
How to Fix Slow Wi-Fi in Indian Apartments — Releasing August 2026
Disclaimer applies to all content on netdaemons.com — see full disclaimer page for details.